
Let’s get familiar and comfortable with the QUIC.cloud CDN Dashboard!
The QUIC.cloud Dashboard is your place to monitor your service usage, assign credit to services, and otherwise configure your domain. And while there is a lot that you can do here, most of it is optional.
We will be focusing on the CDN service here, but you can apply most of what you learn to the Optimization Services, like Critical CSS and Image Optimization, too.
NOTE: If you prefer to learn via video, you can watch our Beginner’s Guide to the CDN Dashboard. It covers all of the same topics that this blog post covers. Just be aware that it was filmed two years ago, and there may be minor differences in some of the screens that you see there.
Before We Begin
You should have already connected your WordPress site to QUIC.cloud with the LiteSpeed Cache plugin, and the CDN should be enabled. If you haven’t done these steps already, see our documentation, or watch this video.
Also, if you are not familiar with reverse proxy CDNs and you’d like to know more, take a look at How the CDN Works before we continue.
My Domains
So, let’s start at the beginning: the My Domains page.
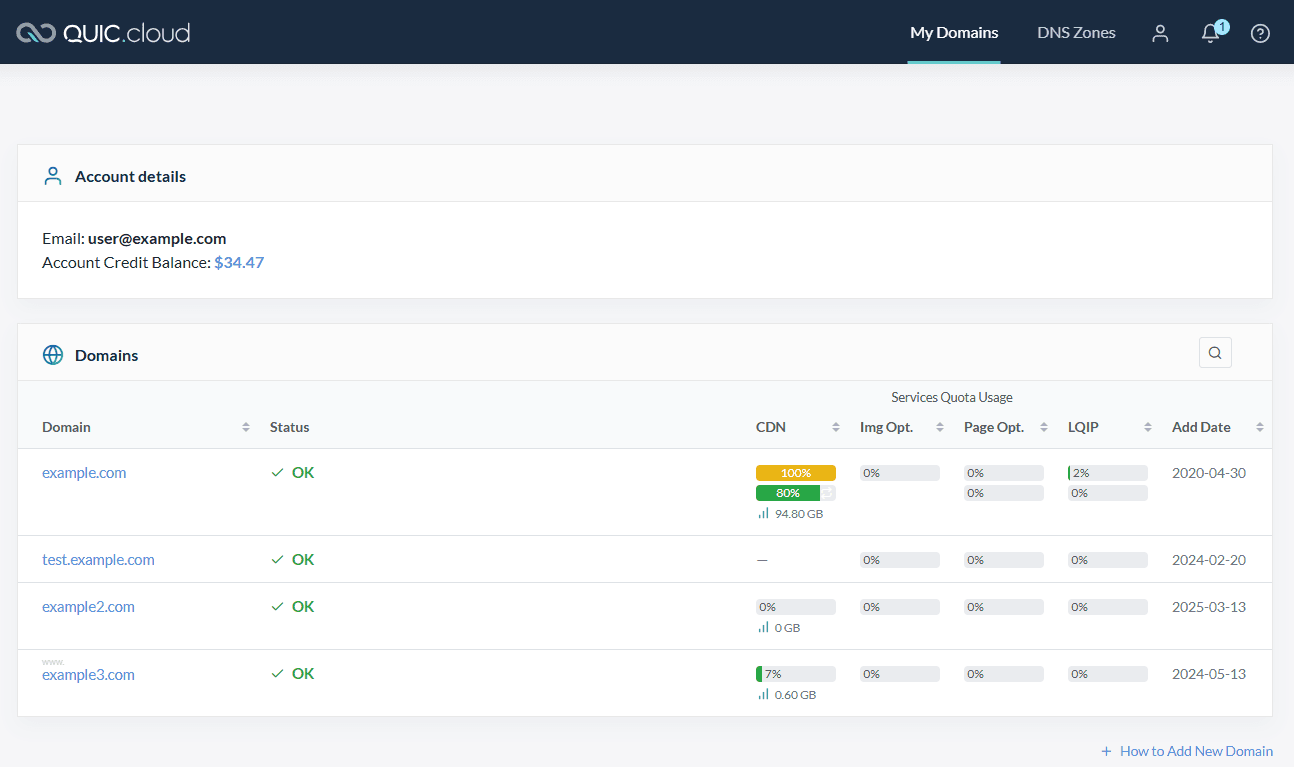
This page is purely informational. You get here by visiting my.quic.cloud in your browser, or by clicking the My Domains link in the navigation bar at the top of any Dashboard page.
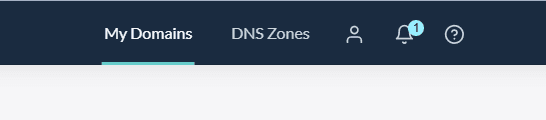
Also on the top navigation bar:
- DNS Zones, which you only need if you are using QUIC.cloud to host your DNS
- The user symbol, where you can edit your profile and account-level settings
- A bell symbol, where you can view your notifications
- A question mark, where you can get help.
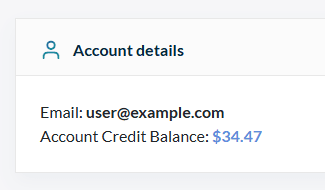
The rest of this page provides some account-level details, including your admin email address, and your account credit balance. Credit is used to purchase additional CDN bandwidth and quota for the optimization services.
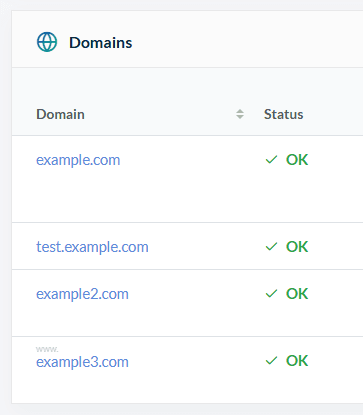
Under the Account Details section is a list of the domains serviced by this account. You may have many domains here, or you may only have one. Domains that are properly connected should have a Status of OK.
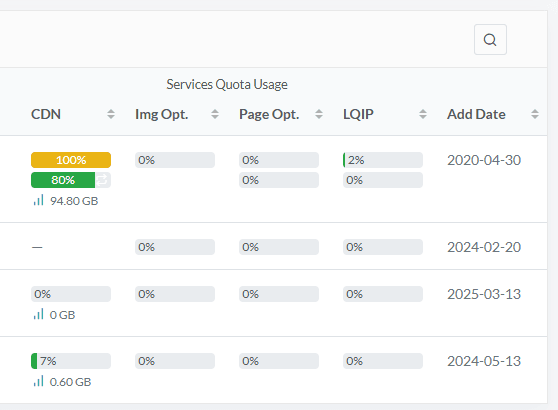
The Services Quota Usage section of the page shows you how much of your free CDN bandwidth or service quota you have used for the month. If you’ve purchased additional bandwidth or quota, there will be another set of progress bars directly underneath the free quota bars. Together, these should give you an accurate picture of how much bandwidth or quota you have left for the month. In this example, the first listed domain has purchased additional CDN bandwidth and still has 80% of it left, while the free bandwidth is used up.
Click on any domain name to go to the Services Overview page for that domain. For this example, we’ll be using the first domain, example.com.
Services Overview
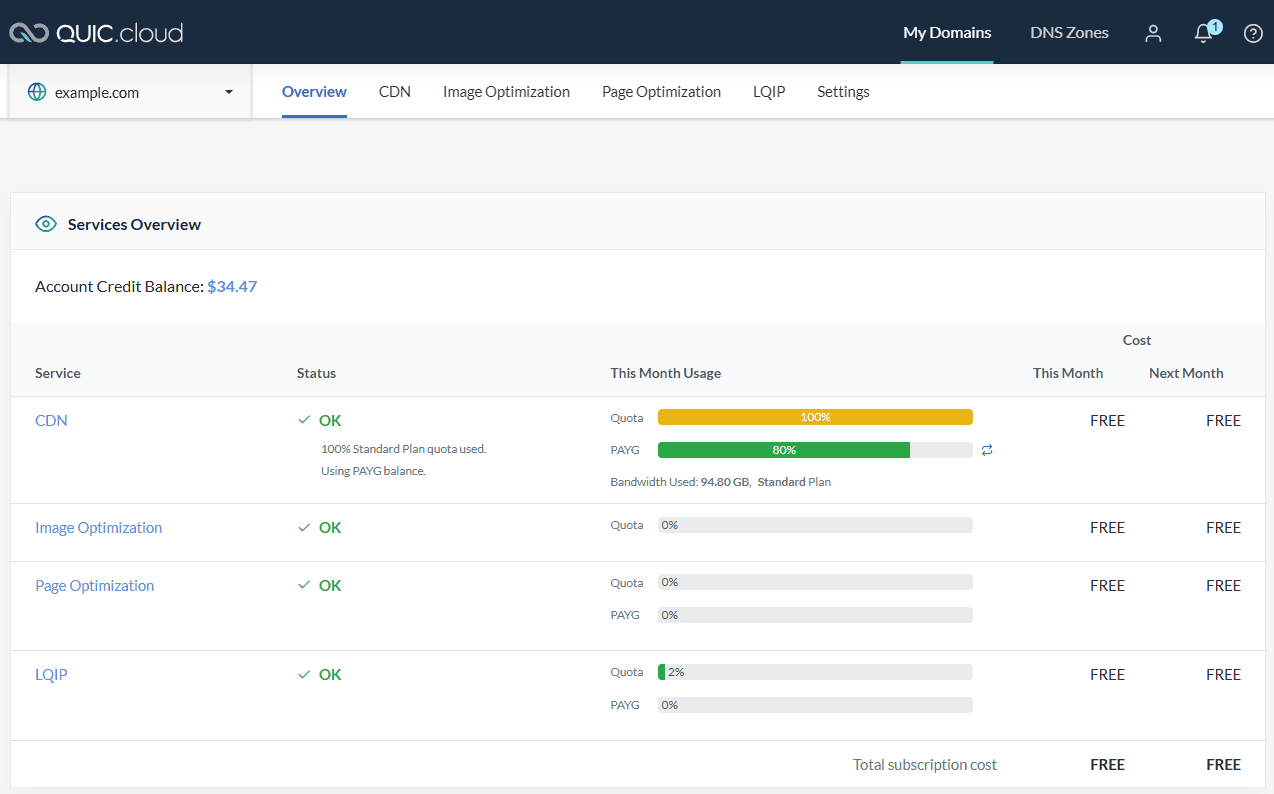
This is another purely informational page, and it gives you a snapshot of the status and service usage for a single domain across all services.
It goes into more detail than the previous page, displaying such information as your CDN plan (example.com is using the “Standard Plan”), information about your pay-as-you-go credit balance, and your subscription costs, if applicable.
Next, we’ll take a closer look at all of the information and settings available in the CDN area of the Dashboard. You can get there by clicking CDN on the top navigation bar, or by clicking CDN in the Services Overview table.
CDN
Up until now, everything we’ve seen has been purely informational. But here in the CDN section, there will be actions that you can take.
Summary
Status
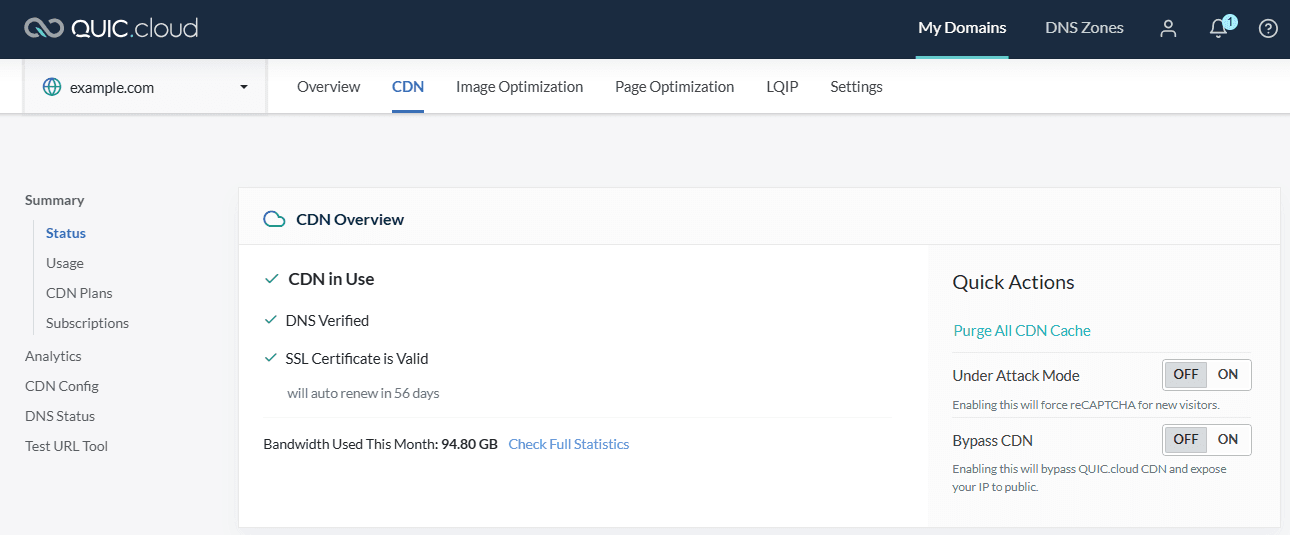
Let’s start with the CDN Overview. If all is well, you will see CDN in Use, DNS Verified, and SSL Certificate is Valid. If there has been some difficulty getting your site up and running on QUIC.cloud, this section will let you know what is wrong and how to fix it.
From here you can Purge All CDN Cache, though you shouldn’t need to. QUIC.cloud CDN’s cache is controlled by the LiteSpeed plugin that controls your server cache. So, as long as everything is running smoothly, the caches should remain in sync.
Another important feature here is Under Attack Mode. If your site is under attack, set this option to ON. All visitors will see a CAPTCHA challenge before they can proceed to your site. When the threat is over, set Under Attack Mode back to OFF, and everything will go back to normal.
Lastly, Bypass CDN is there for you if you need to temporarily turn off the CDN for any reason. If you set this to ON, visitors will no longer be served content from a CDN node. Instead, the content will be served from your own origin server. Turn this OFF to resume CDN service.
Current Month Usage
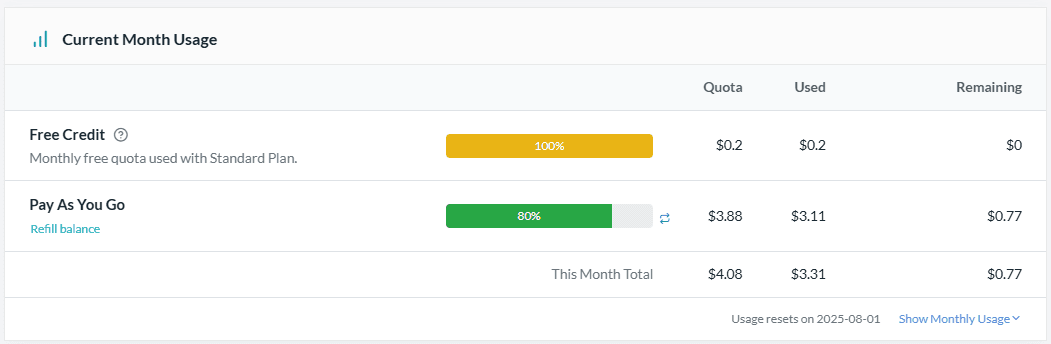
Next, the Current Month Usage section expands on the credit information from the previous page, and provides specific details about your site’s credit usage. Click the Show Monthly Usage link to see a twelve-month history of your credit usage.
CDN Plans
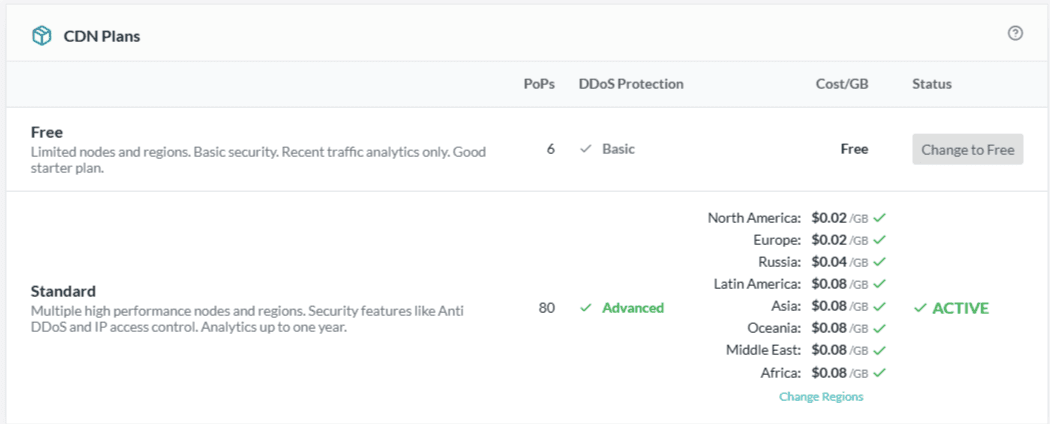
Next, in CDN Plans, you will see details of the plan you are currently using, and if you want to, you can switch to a different plan. example.com is using the Standard Plan. Standard Plan users may also disable some CDN regions. Any traffic originating from a disabled region would be directed to a CDN node in one of the active regions. You can learn more about the available CDN plans here.
Your Free Tier

Every month your domain is given free credit to be used towards CDN bandwidth. The amount of credit varies depending on your domain’s Tier. Tiers are automatically assigned to a domain based on the server that domain is using. So, for example, if your website is powered by LiteSpeed Web Server’s Enterprise edition like example.com is, then your domain is assigned the LiteSpeed Enterprise tier, and gets twenty cents in free credit every month. This is the only job of your tier–to determine how much free credit you get every month. It does not affect your services in any other way.
If you only see one tier listed, you can click the View All Tiers link to see the others and compare benefits. If you want to learn more about this system, take a look at our About the Tier System doc.
Pay as You Go

The last thing in this Summary section is Pay as You Go. If you are running out of CDN bandwidth, you can purchase more here.
And if you routinely run out of CDN bandwidth like example.com does, you can enable Auto Refill, which will use your account-level balance to purchase more bandwidth, when your remaining quota goes below a specified threshold. If you want to know more about how all of this works, see our Credit Management Made Easy blog post.
Analytics
The Analytics area provides a selection of reports that can give you insights into your traffic. This page is strictly informational, and you cannot hurt anything by clicking around or changing the filters, so have fun exploring and learning something about the people who visit your site!
QUIC.cloud saves a year’s worth of data, which you can filter by hour, day, or month, and by data center location.
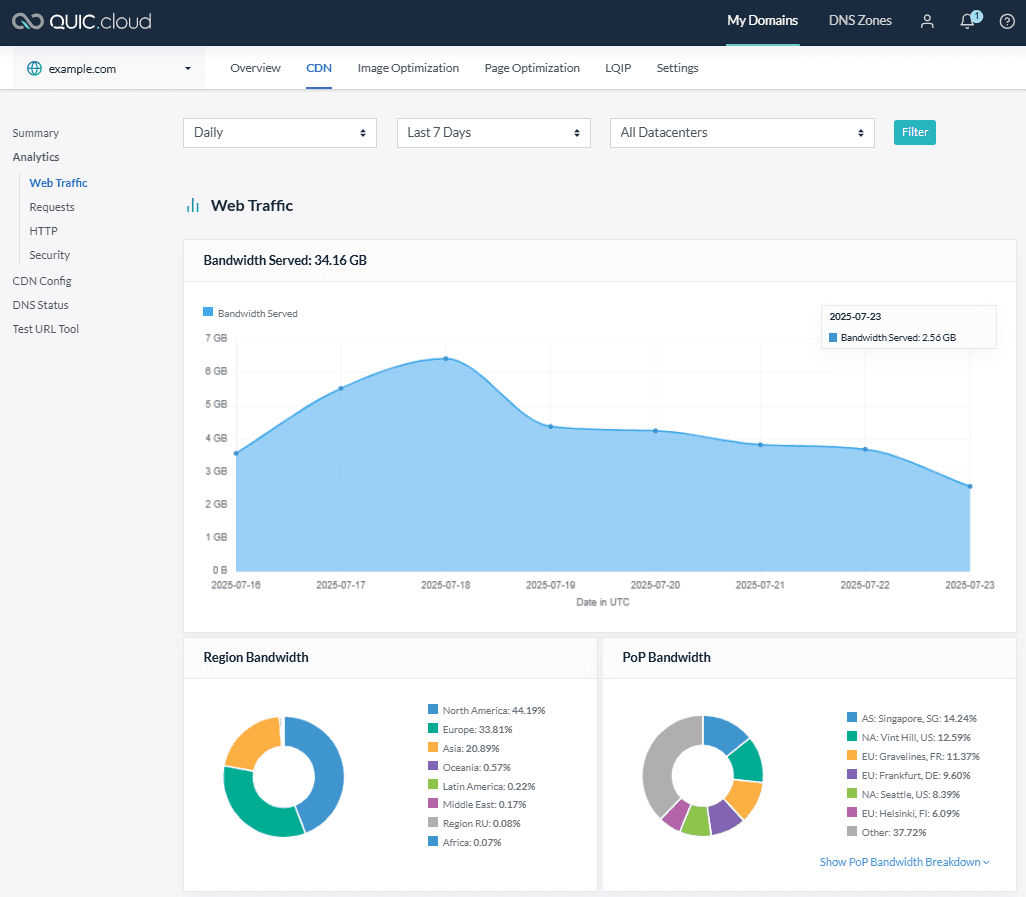
In Web Traffic you can see which regions and PoPs your traffic is originating from, and how much bandwidth is consumed from different regions. If you’re curious about which PoPs, specifically, your traffic is coming from, you can click Show PoP Bandwidth Breakdown and see a more detailed list.
Most of example.com’s bandwidth is originating from North America, but there’s a node in Singapore that appears to be quite popular this week.
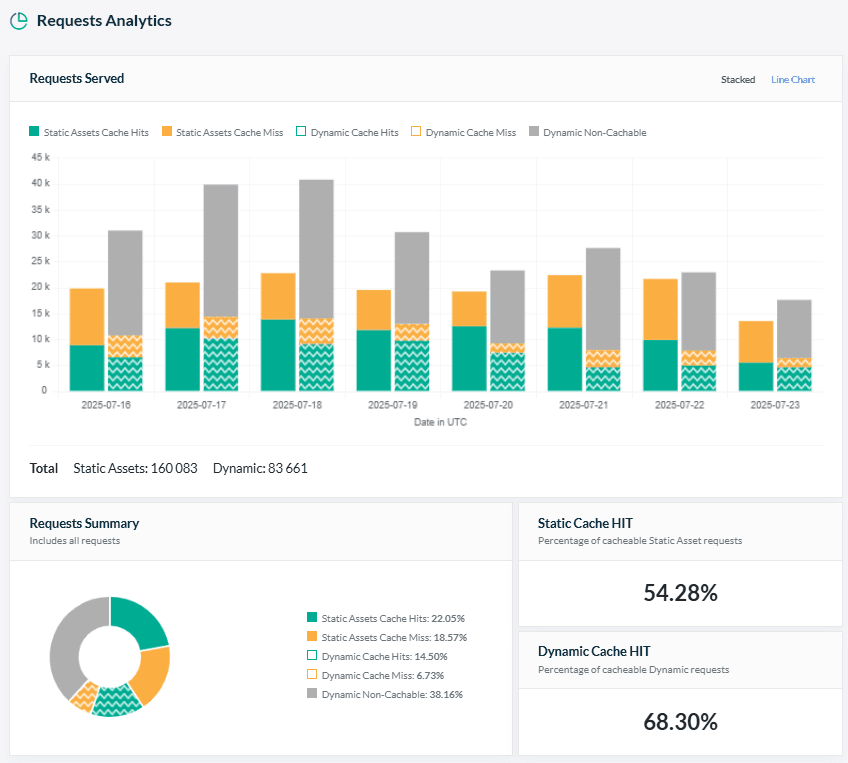
Requests Analytics provides information about static and dynamic cacheable content, and how often requests are cache hits or misses.
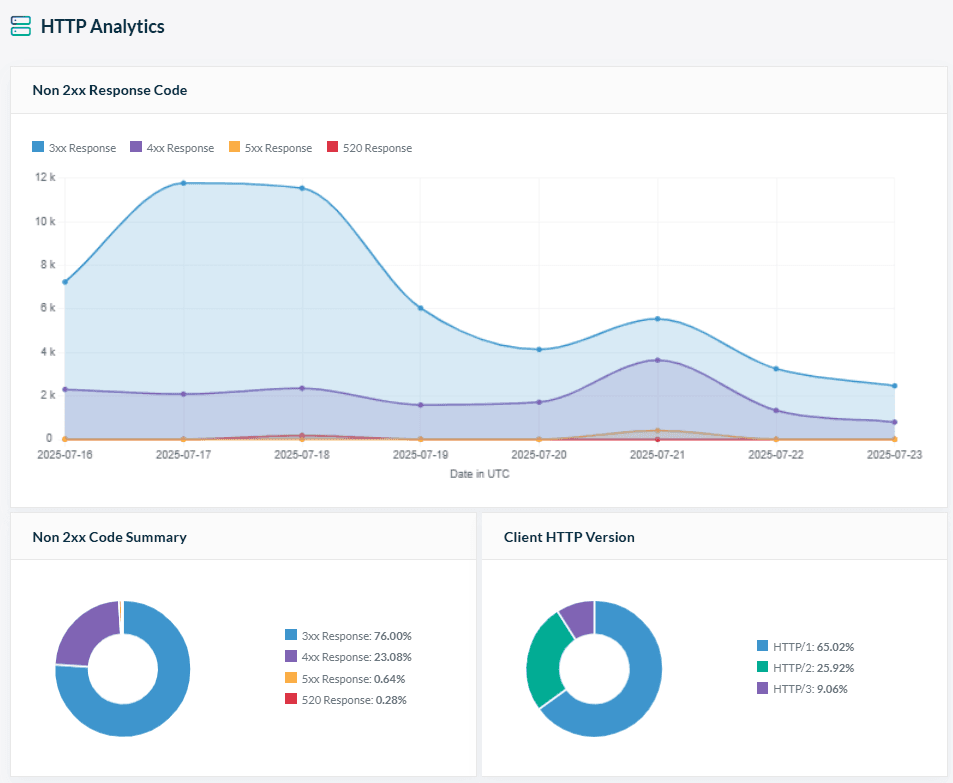
HTTP Analytics explores the different types of HTTP errors your website might generate. It also takes a look at the clients being used to access your website. In this case, the majority of visitors to example.com are connecting with HTTP/1.
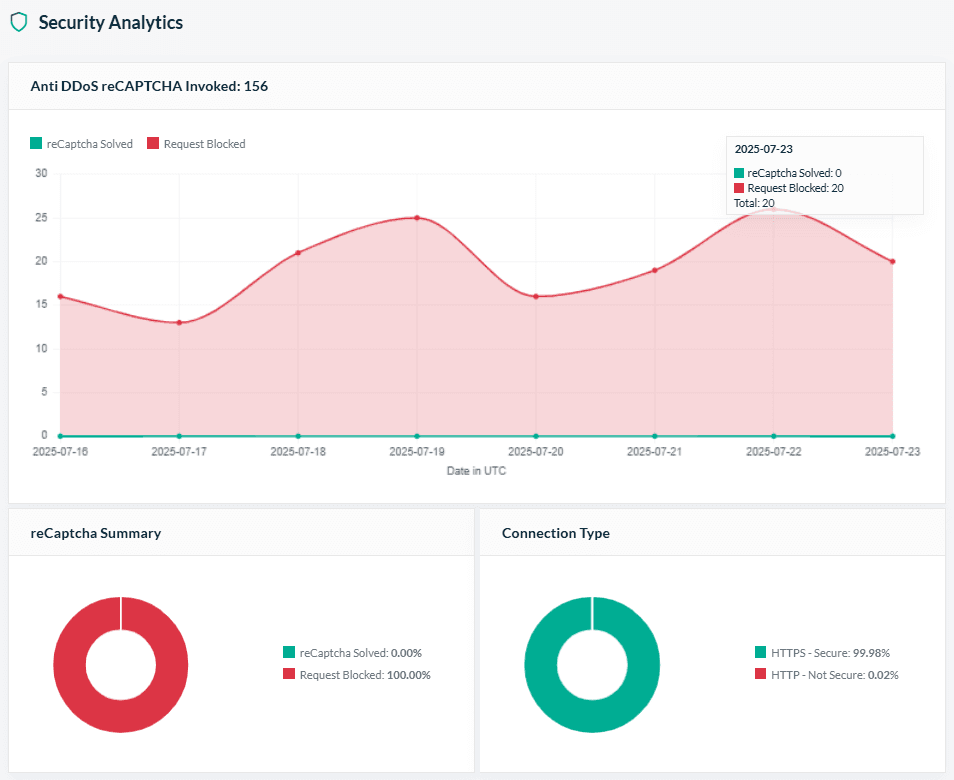
Lastly, there is Security Analytics, which takes a look at how often CAPTCHA is invoked, and to what result.
CDN Config
QUIC.cloud’s default settings should work for most domains, but you can use the CDN Config area to tweak a number of configuration settings. (Please note that if you are on the Free Plan, some of these settings will not be configurable for you.)
We won’t go into detail here, but simply show you where a few important configurations are, in case you need to make changes later. Everything we are looking at today is explained in the documentation.
You can click on any Learn More link within the QUIC.cloud Dashboard to be brought to the appropriate documentation, which should explain everything. And if you still have questions? Our friendly support team is here to help.
CDN Settings
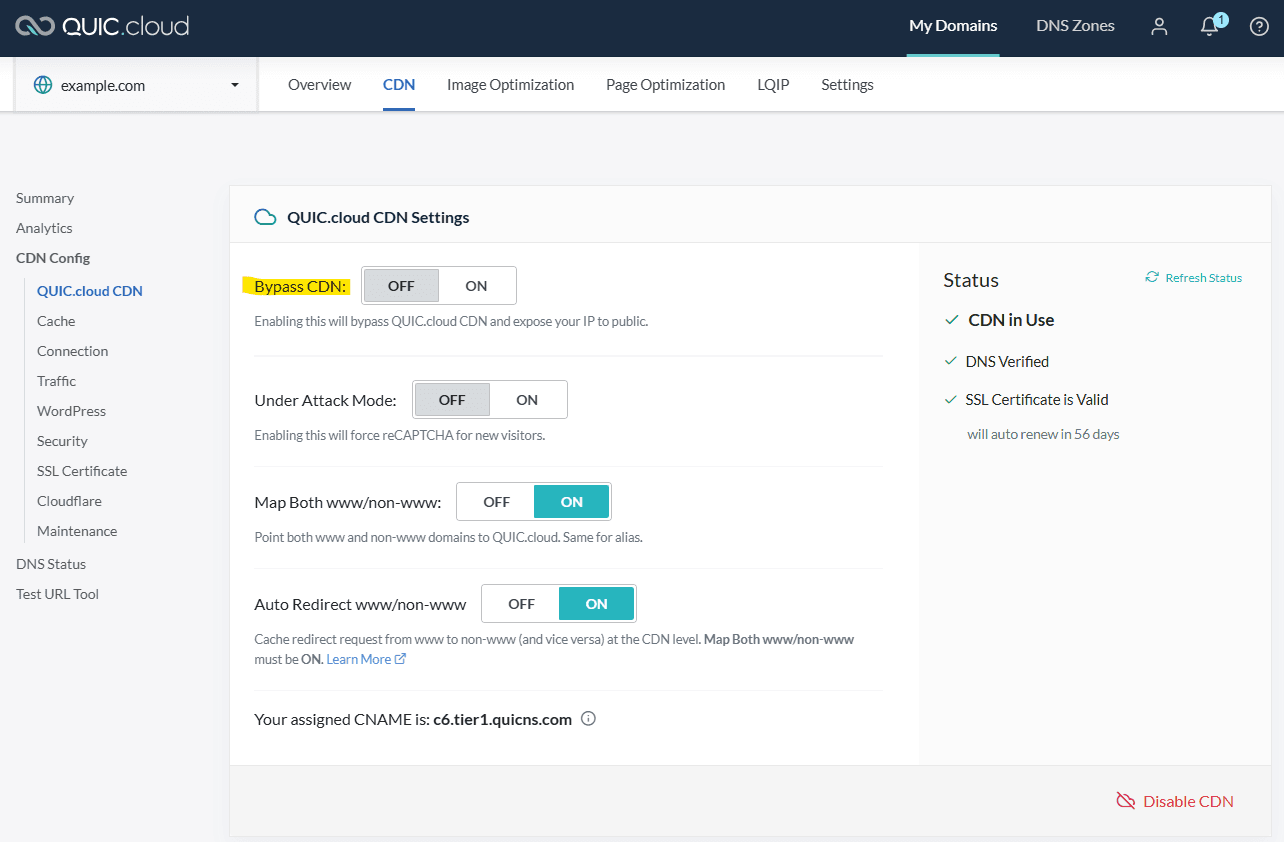
The CDN Settings area is one of two places where you can go to temporarily turn off the CDN (we mentioned the other one earlier, in the CDN Summary). To do so, set Bypass CDN to ON. When you’re ready to start up CDN service again, set it to OFF. This is the tool that you should use if you have a reason to turn the CDN off for a short time. It allows you to start the CDN service back up again easily, and without going through the entire setup process again.
Cache Settings
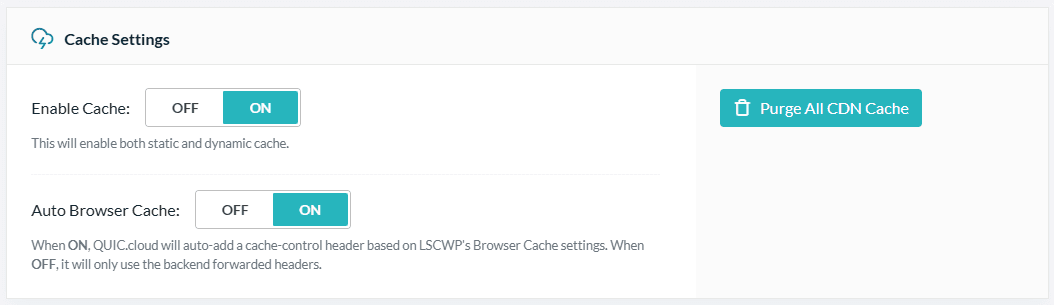
QUIC.cloud CDN caches your content at CDN nodes around the world, and this section controls that behavior. By default, CDN-level caching is enabled, as is browser cache, but you can use these settings to change that. You can also use the Purge All CDN Cache button to clear the cache at all of the CDN nodes. Though you shouldn’t need to. You can use this button if somehow the caches have gotten out of sync.
Connection Details
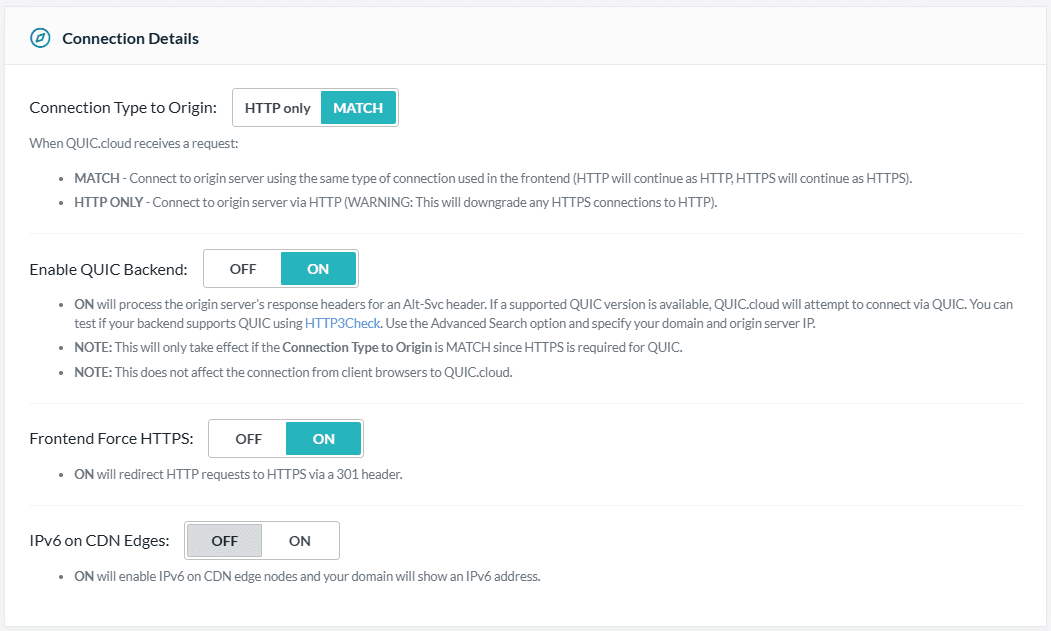
QUIC.cloud is the only CDN that can potentially support a complete end-to-end HTTP/3 connection from origin server to CDN to client browser. These settings allow you to configure that end-to-end connection. You can turn HTTPS connections on or off between QUIC.cloud and the frontend or backend, and you can enable a QUIC connection to your backend server. If you don’t know what any of this means, you should be fine using the default settings. If you want to know more, check out the HTTP Access documentation.
Traffic Management
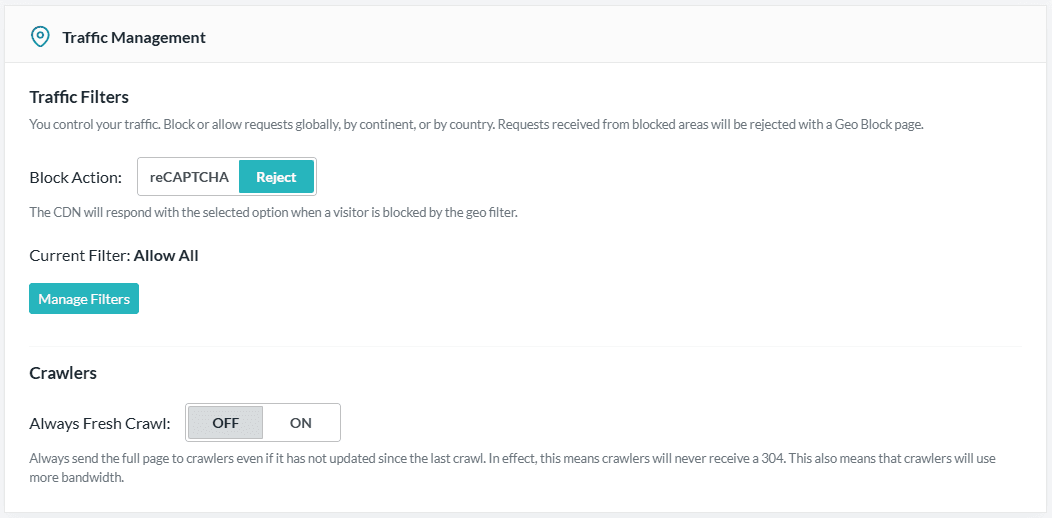
You may wish to control which regions can visit your site. The Traffic Management section allows you to configure which countries and continents may or may not access your content. Visitors from disallowed areas may be served a CAPTCHA or outright rejected. If you are happy allowing a global audience, then you can safely ignore this section. Want to know more? We go into details in our Traffic Management documentation.
WordPress
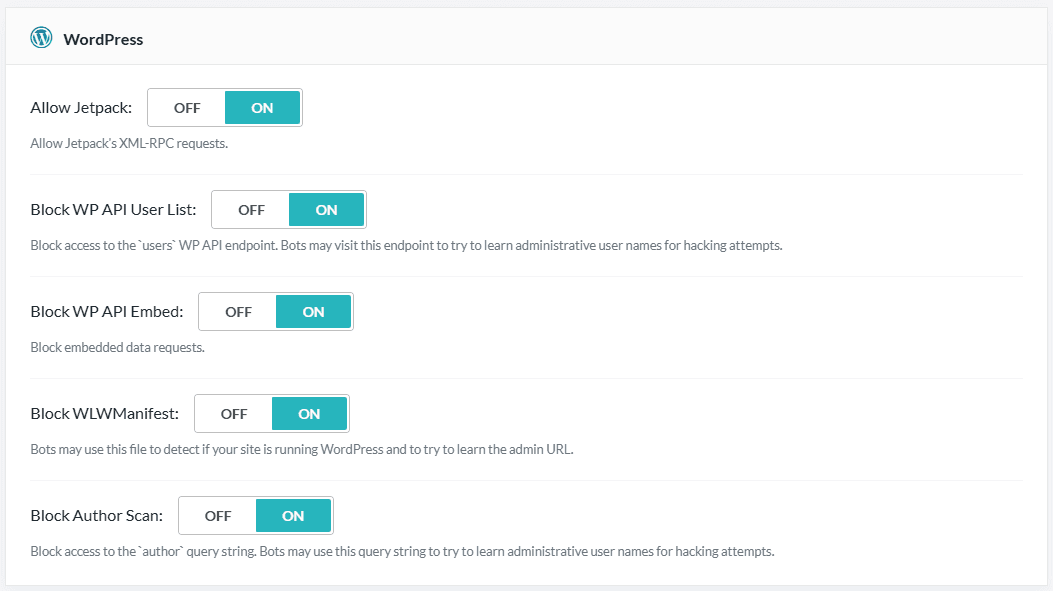
The WordPress section provides WordPress-specific security settings. By default, all of these security measures are disabled, but you can enable them if you wish to block access to certain types of WordPress requests. Learn more about each of these settings here.
Security
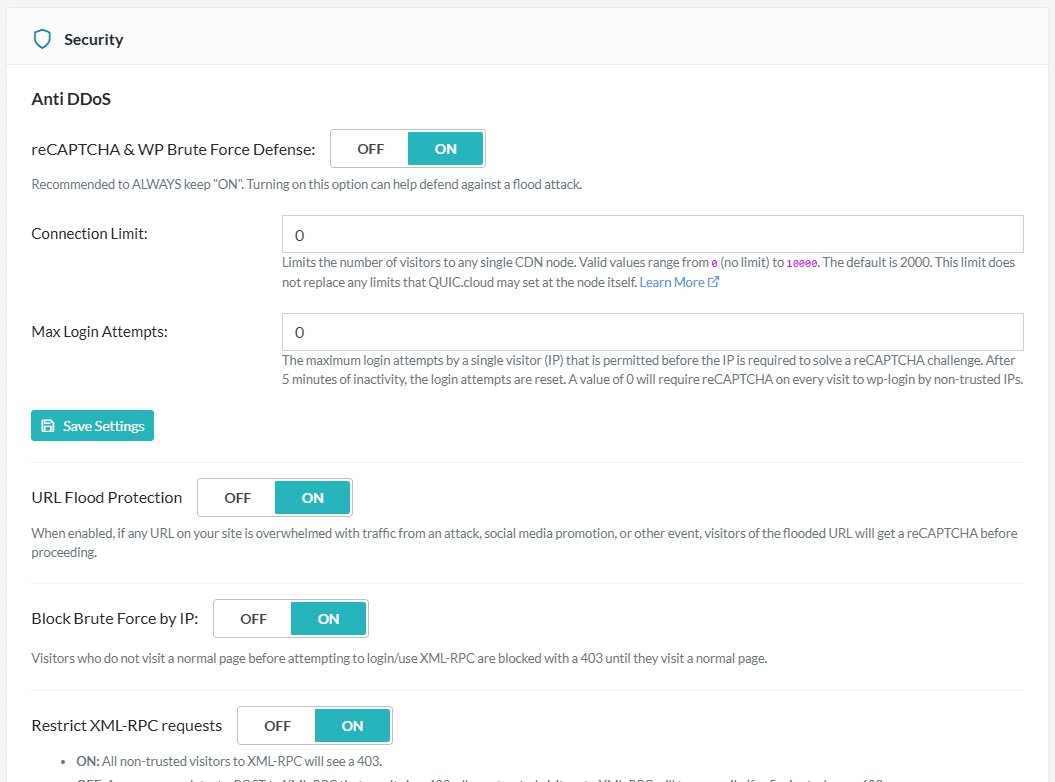
The Security section is the biggest configuration area, and we have only included a partial screenshot here. If you don’t know what some of these settings are, you can safely leave the defaults in place. We’ve chosen default settings that should work for most sites. Learn more about Security settings here.
SSL Certificate
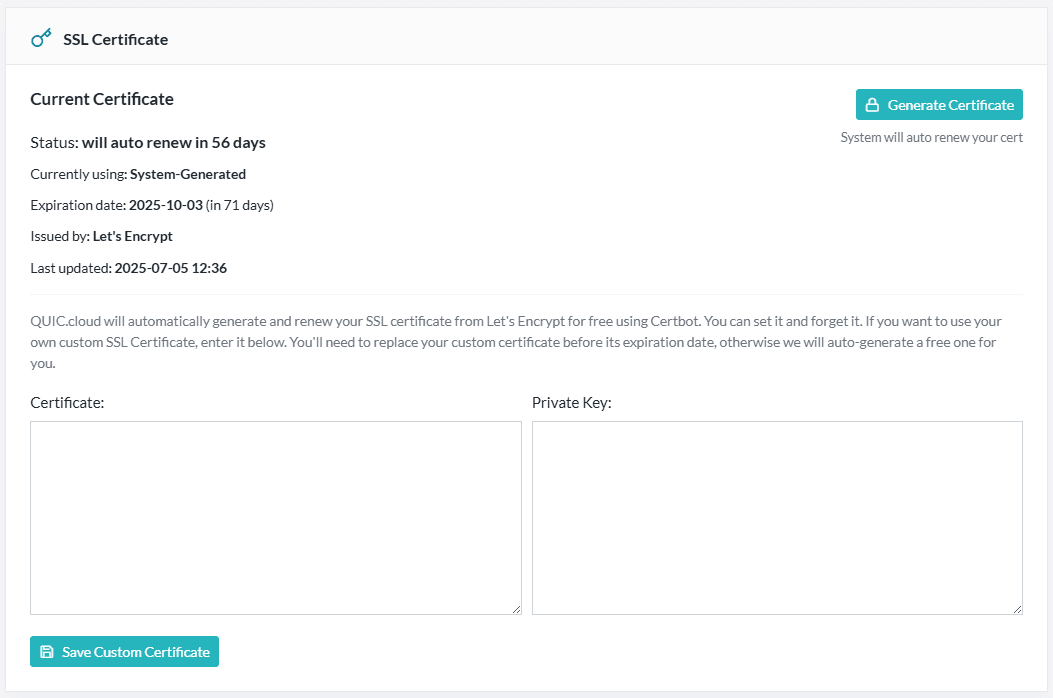
If you’ve chosen to use your own SSL certificate, then this section is where you would enter the details of that certificate. If you are letting QUIC.cloud generate your SSL certificates for you–and there’s usually no reason not to–then you can ignore this section.
Cloudflare
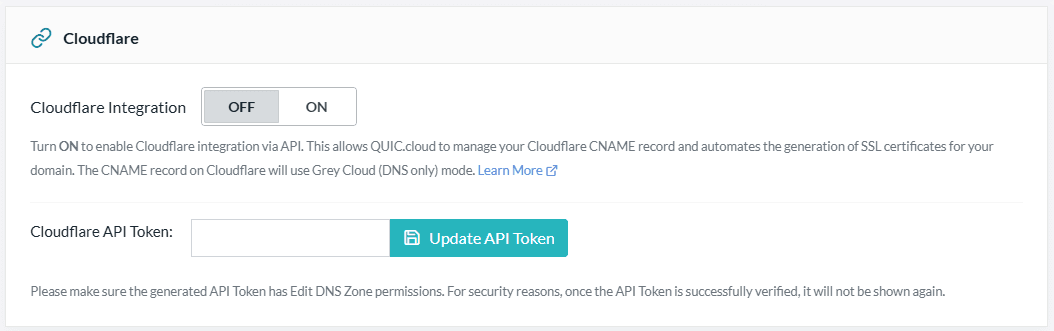
The Cloudflare section is only for those who have chosen to use the Cloudflare Integration option when setting up their QUIC.cloud account. This is a simple, risk-free way for Cloudflare users to try QUIC.cloud. See our Cloudflare Integration documentation for more information about this option.
Maintenance
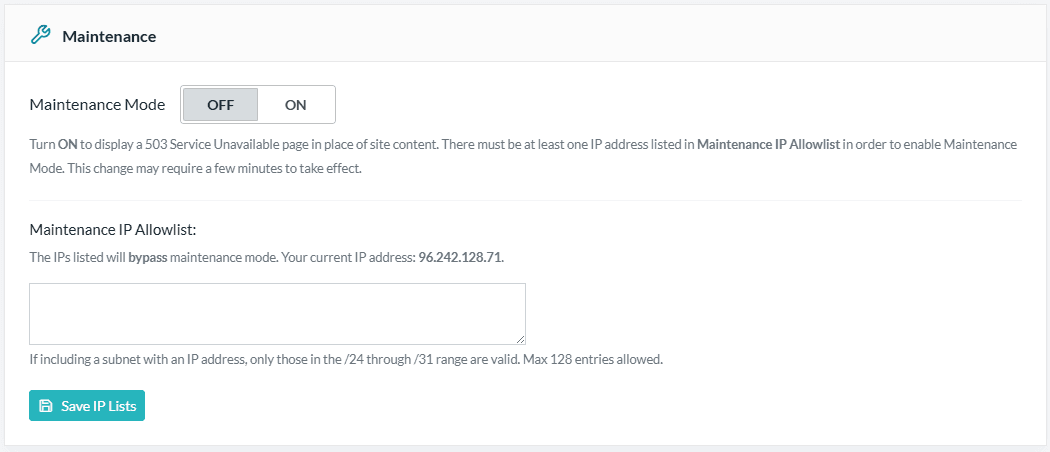
And finally, the Maintenance section is for you to enable Maintenance Mode on your site. You only need to use this if you are working on your site and don’t want any visitors. Visitors will see a 503 error until you turn Maintenance Mode off.
DNS Status
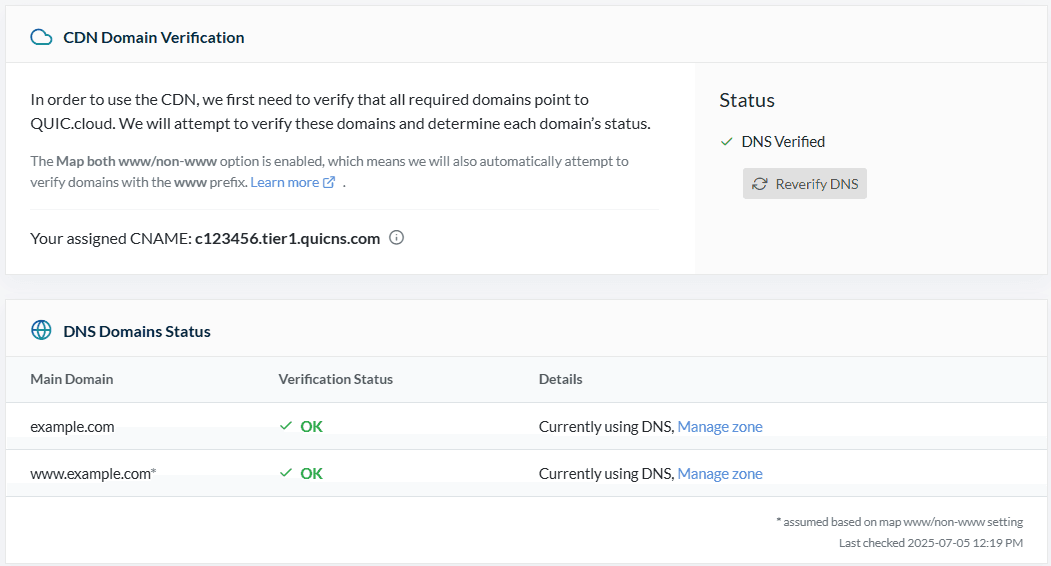
Next on the CDN page is the DNS Status section. When you first sign up for QUIC.cloud CDN, your domain’s DNS must be verified. The top area of this section gives you the status of this verification.
Under that, you can see more detailed information about the verification and DNS status of your domains.
Test URL Tool
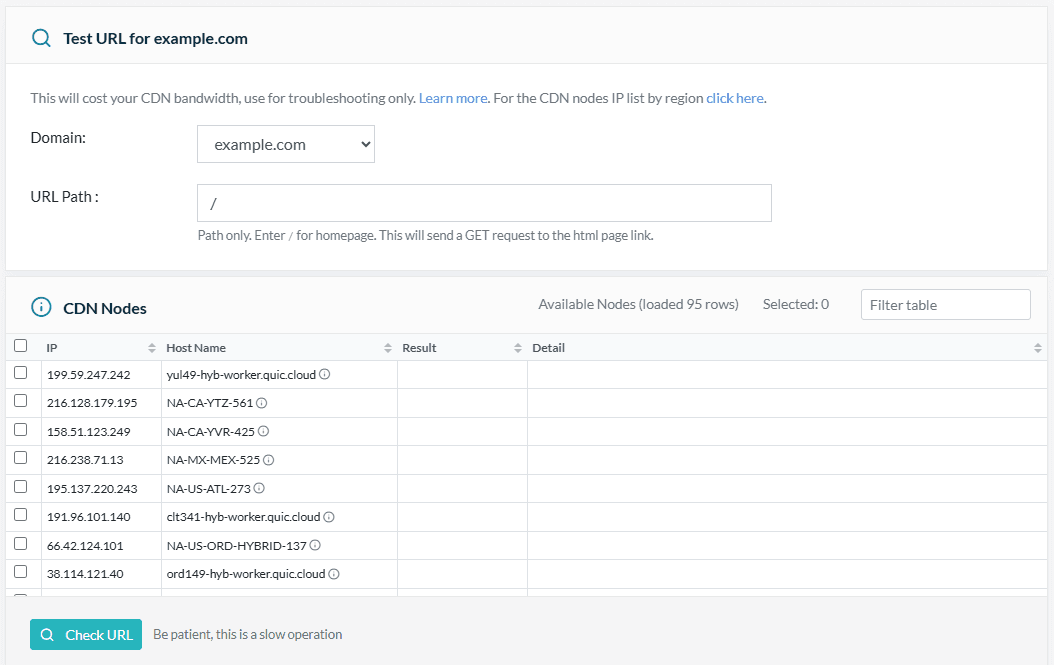
The last thing on the CDN page is the Test URL Tool. This troubleshooting tool is available for you to use if you suspect that one of the CDN nodes is unable to communicate with your origin server. Select the nodes you want to check and press the Check URL button.
Be aware that the use of this tool consumes your CDN bandwidth, so you might want to use restraint. See the Test QUIC.cloud CDN from all locations documentation to learn more about using this tool.
And THAT is everything you need to know about the CDN Service! Let’s take a quick look at what else is on the dashboard.
Optimization Services
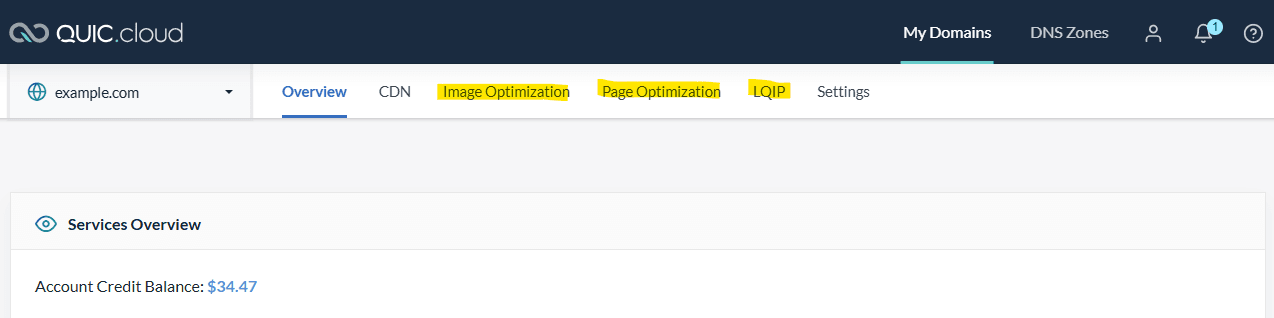
The next three options in the top menu pertain to the QUIC.cloud Online Services, which you may or may not be using. These services are Image Optimization, Page Optimization, which includes Critical CSS, Unique CSS, and Viewport Images services, and LQIP, which stands for Low Quality Image Placeholders.
If you want to learn more about these services, here are some links to get you started:
Settings
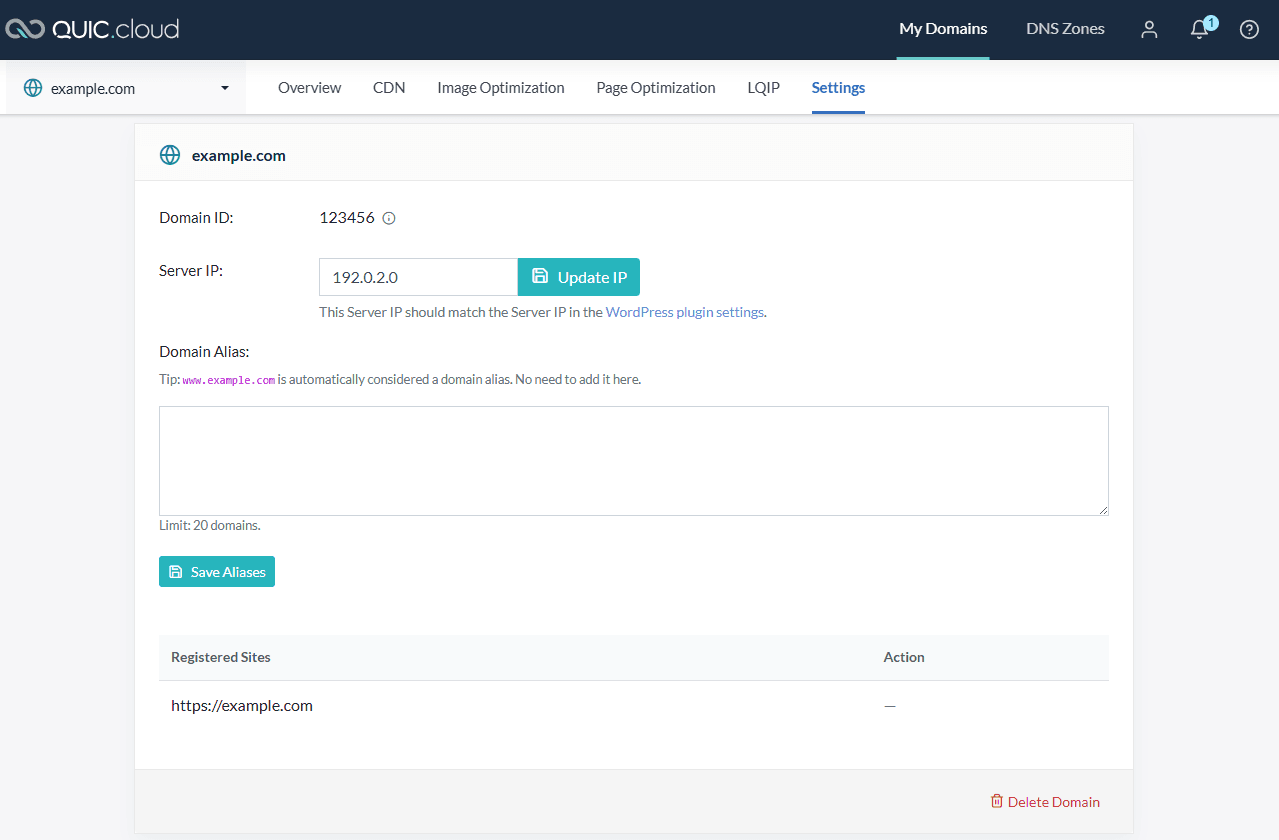
Lastly in the top menu, we have the Settings section. You can update your server IP address here, if it changes, and you can list any domain aliases you may have.
This is also the place where you would go to delete a domain that you no longer wish to use with QUIC.cloud.
Conclusion
And there you have it. You should now know where everything is within the QUIC.cloud Dashboard. If you are a beginner, or simply someone who prefers not to explore the options, you can leave most of these settings alone, and everything will work just fine.
If you are curious, though, and would like to explore the CDN’s capabilities further, be sure to take a look at our documentation, which tells you everything you need to know!
This QUIC.cloud CDN dashboard looks incredibly comprehensive, like a control panel for a website space shuttle! Its impressive how many buttons and toggles there are – Under Attack Mode alone sounds like a plot device from a bad sci-fi movie. On one hand, its great to have all these features for optimizing and protecting your site, but on the other, it makes me wonder if I accidentally joined a secret internet army. The detailed analytics are fascinating, though – who knew tracking where people click could be so… data密集的? All in all, its a bit much for someone who just wants their cat videos to load faster, but the sheer number of Learn More links is reassuring. At least theres help if I accidentally turn my site into an attack bunker or start serving content from Singapore on a Tuesday.