Images. They make your site beautiful and unique. They give personality to your published content. And they lend a vibe to your website that would be hard to replicate with text alone. Most site owners can agree that images are important. But images can come with a pricey bandwidth cost.
Image transmission is likely responsible for a large portion of your website’s bandwidth usage. Images take space to store and time to transmit from your server to the eager visitors on the other end. And those visitors are an impatient lot. They don’t want to wait for your pretty pictures to load no matter how compelling your photography may be, or how desirable the product you are selling is. If it takes too long to transmit, you will lose their attention.
So what can you do?
You can make your images smaller, and thereby faster to transmit.
Read on to see how QUIC.cloud’s Image Optimization online service can help you with that.
Why Image Optimization?
Let’s say you have a blog post with six large images, each 5MB in size. At the average mobile visitor’s connection speed, those images are going to add roughly one full second to the page load time.
On the other hand, if you let QUIC.cloud optimize those images, you could find that they’ve all been reduced in size by anywhere from 10% to 90%! Even with a 50% reduction, that’s half a second your visitors don’t have to wait.
The best part of this is that the look of your website doesn’t suffer at all. By default, QUIC.cloud Image Optimization reduces an image’s quality to 82% (though you can adjust this, if you want to). It is very difficult to tell the difference between an image of 100% quality and that same image reduced to 82% quality. Your website’s images will have significantly smaller file sizes, and nobody will be able to tell that anything has changed.
Enable Image Optimization
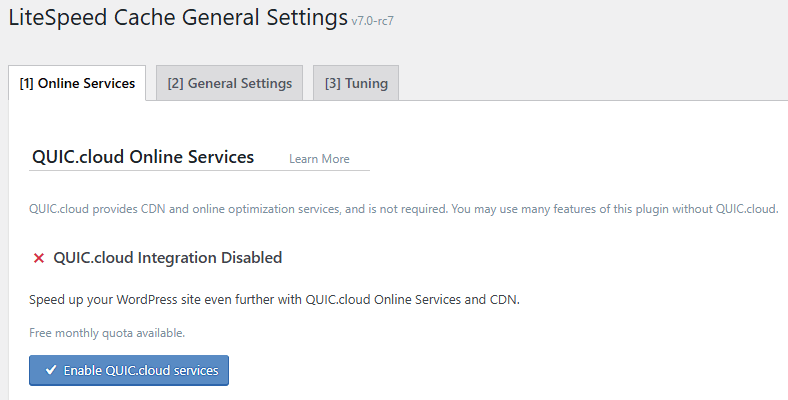
Image Optimization is configured and initiated from the LiteSpeed Cache plugin for WordPress.If you haven’t already done so, install and activate the plugin, and enable QUIC.cloud services from the LiteSpeed Cache > General > Online Services page.
Navigate to LiteSpeed Cache > Image Optimization > Image Optimization Settings. You will see several options here, which we explain in more detail in the documentation. These are the important ones for getting started:
- Auto Request Cron: Turn this on to let Image Optimization run by itself. Requests will be automatically sent to QUIC.cloud when there are new images available to optimize.
- Auto Pull Cron: This is enabled by default, and it automates the process of receiving the optimized images from QUIC.cloud.
- Optimize Original Images: If you want to optimize your JPG and PNG files (and you probably do if you are reading this), this setting should be enabled
- Next-Gen Image Replacement: Enable this setting to allow the LiteSpeed plugin to create WebP or AVIF images. Then, if the visiting browser supports the next-generation format you choose, those images will be served instead of the JPG or PNG versions.
Press the Save Changes button and click the Image Optimization Summary tab.
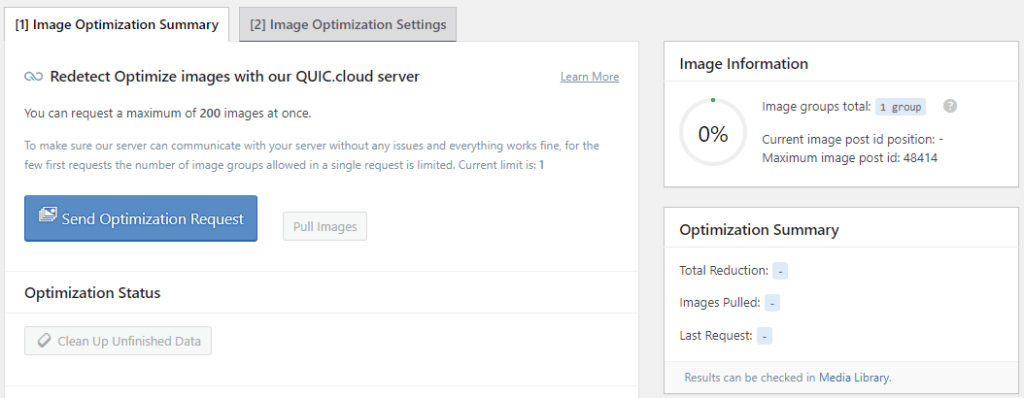
Press the Send Optimization Request button to begin your first round of Image Optimization.
How Image Optimization Works
If you have enabled the Auto Request Cron, you will not need to press the button to submit future groups of images for processing. The process will be automatic.
Here’s how it works:
- You create a new post or gallery or otherwise add images to the WordPress Media Library
- The Auto Request Cron gathers these images and sends them to QUIC.cloud
- QUIC.cloud optimizes the original images, and/or creates next-generation versions of the images, depending on your domain’s settings
- QUIC.cloud notifies WordPress that your optimizations are ready
- The Auto Pull Cron saves backups of the original images, and saves the optimized images in the Media Library
- The next time a visitor requests the images for a page on your website, LiteSpeed will either serve the optimized JPG or PNG, or it will serve the WebP/AVIF version, depending on the capabilities of the client browser
See the LiteSpeed Cache documentation for more detailed information about how this works.
Monitor Image Optimization Usage
Your QUIC.cloud Dashboard allows you to monitor all of your service usage and breaks everything down by type of service. To access Image Optimization, visit https://my.quic.cloud (the QUIC.cloud Dashboard), click the name of the domain you wish to monitor, and click Image Optimization. Or, you can access it via https://my.quic.cloud/dm/example.com/img_optm, where example.com is the name of your domain.
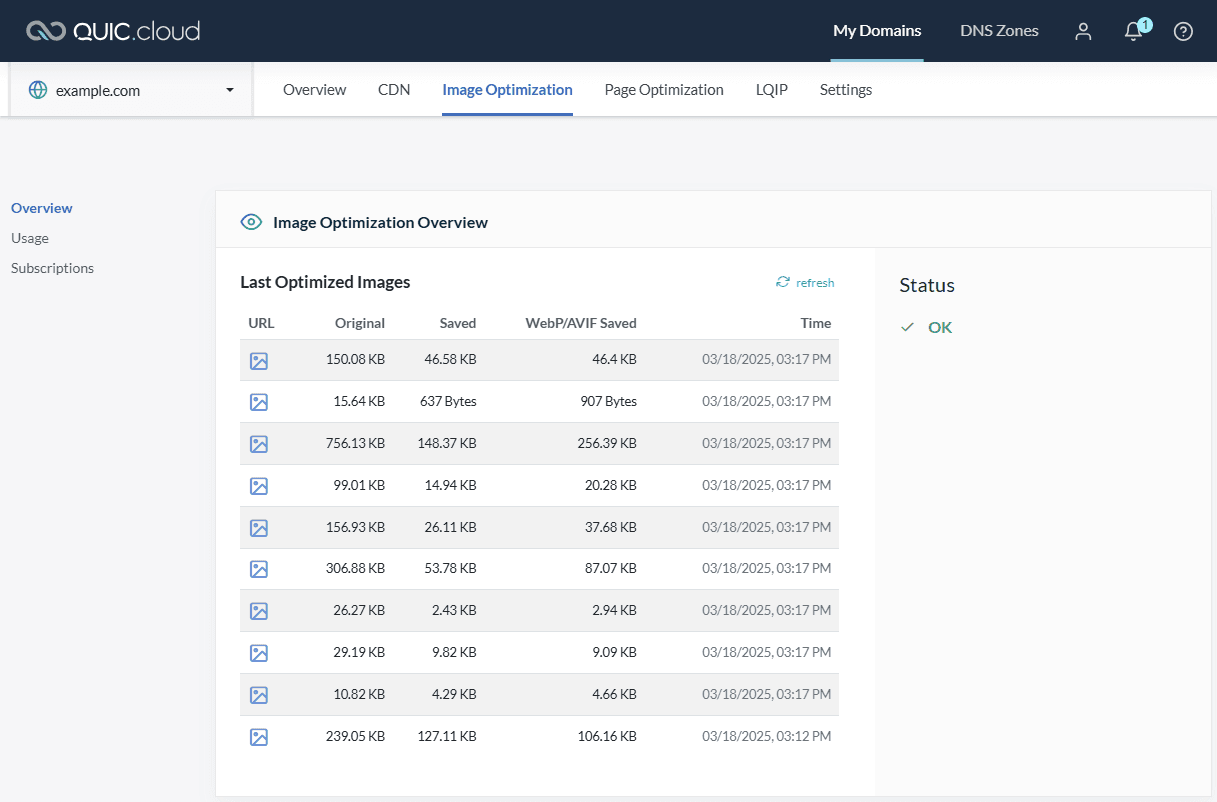
At the top of this page, you will see a list of the most recent Image Optimization requests received by QUIC.cloud. Scroll down to see your usage for the month, your free quota for the month and the tier your domain belongs to, and the monthly subscriptions available to you. At the bottom of the page is the Pay as You Go option, which allows you to purchase additional quota for the Image Optimization Advanced Queue on an ad-hoc basis.
Image Optimization Costs
Image Optimization via the Standard Queue is 100% free. You can have every image on your website optimized by QUIC.cloud, and you can generate WebP images, without paying a cent.
There are two image processing queues at work: the Advanced Queue and the Standard Queue. QUIC.cloud gives every domain some free Advanced Queue quota every month. Once it is used up, all requests are sent to the Standard Queue for processing.
This optional power-up subscription is available for a monthly charge:
- Advanced Queue: Allows you to send 20,000 additional requests to the Advanced Queue each month, and allows you to generate AVIF images.
Below the subscription is a pay-as-you-go option. Use this to increase your Advanced Queue quota on an ad-hoc basis. You can manage this manually, or enable auto-refill to top up your quota whenever you are running low.
See Online Services Costs for the specifics.
Troubleshooting
Chances are Image Optimization will give you no trouble whatsoever. However, if you find yourself running into an issue that you can’t solve, take a look at our Troubleshooting documentation for assistance. And if you still have questions, open a ticket. Our support team is happy to help.
Conclusion
If images are a big part of your website’s vibe, then there is great potential there for reducing your page size, increasing transmission speed, and improving your website performance. Let QUIC.cloud’s Image Optimization service shrink your image file sizes and make your page load noticeably faster!